
Viral
How to Keep Cut Flowers Fresh
If you don’t take adequate care of your fresh cut flowers, they may droop and die before their time. Sophy Crown Flowers Dublin’s senior florist shares tips on how to keep flowers looking their best.
How to make cut flowers stay longer.
How can cut flowers be kept fresh for as long as possible? To keep your cut flowers fresh, follow these tips from flower farmers. You’ll also learn about the best flower varieties to plant in your own backyard.
Picking Fresh Flowers at the Right Time of Year
Cut garden flowers early in the morning or early evening, when temperatures are cold and the stalks are full with water. When exposed to the intense heat of midday, plants become more susceptible to wilting.
For most flowers, avoid choosing them when in full bloom because they won’t stay as long; pick them when they are just starting to show colour. (Note: This isn’t true of roses, which do not continue to develop.)
How to Cut Flowers Outside in the Garden
Always use a sharp knife. Steer clear of scissors, which might damage the plant’s water passages.
As soon as the stems are cut, place them in a bucket of clean, tepid water (not cold water).
If possible, put the flowers in their bucket of water in a cool, dark area for a few hours to help them stabilise before arranging. Even better, leave them overnight.
Keep flowers as cool as possible, but avoid placing them in your fridge if you can. Florists’ coolers range from 33° to 40°F, so your fridge certainly won’t be cool enough and any fruit or vegetables could generate ethylene gas, which shortens the life of cut flowers.
How to Pick a Vase
Pick the appropriate container for the job. Always use a fresh vase for your flowers, one that has been well washed and is free of any detergent or residue. A taller vase is better suited to cut flowers that are more delicate and light in weight. Reduce the height of large blooms and place them in a low vase to allow them to spread out.
Use a vase with a broad opening to allow for enough air circulation and enough space for all the stems.
Always use a fully clean vase, as bacteria can survive in filthy vases and your flowers may not last as long.
Tips on How to Cut Flowers for a Vase
- Strip all the leaves from the lowest half to two-thirds of each stem. Do not leave any leaves below the water line, as they could decay and harm the quality of the water.
- Before putting the flowers in water, trim the stems by two inches. The cleanest cut can be achieved with garden shears, although standard scissors will also work. Make 45-degree cuts on the stems to increase surface area and improve water flow. Some flowers, like roses, tend to develop air bubbles lodged in their stems, preventing water flow. To prevent this issue, cut the flower stalks underwater.
- Maintain your flowers consistently. Replace dirty vase water with fresh water and clean your vase every single day. Dirty water can cause to bacterial growth that will swiftly result on wilting. To aid in water absorption, trim your flower stems every two to three days.
- Re-cut the stems at an angle. A slanted cut helps if you are using floral foam; a stem with a point is easier to place. Cut flower stems at an angle also avoids the stem from resting on the bottom of the vase and sealing itself over. Angular cuts also provide a bigger surface area for water uptake.
- Cut stems underwater if you wish to trim the stems of cut flowers before arranging them; otherwise, the stem can take in too much air, generating a blockage that keeps water from the bloom. (This is especially true with roses.) Underwater cutters are available from floral supply companies, or you can cut a flower in the yard, instantly submerge the stem in warm water, and cut it again in the house while holding it below the water line.
- Poppies, milkweed, and other flowers with milky stems should be held in a flame for about 15 seconds immediately after cutting. This closes the latex in the stem but keeps the water-conducting channels open. Without searing, the latex ingredient can leak into the water and causing it to degrade soon. Other flowers in the vase may also suffer as a result.
- Crush the stems at your peril. If you have a woody stem—on lilacs, for example—just cut above the stem. Flowers have been crushing stems with mallets for years. In fact, hammering the stems causes the stems decay faster in the water. If you can’t cut above the woody stem, soak the entire stem in water for 20 minutes to an hour before cutting.
- Keep cut flowers out of hostile conditions. Refrain from placing your fresh flowers in direct sunlight, near hot appliances, or near gusts of air from fans, air conditioning, or open windows. Tulips, for example, are highly heat-sensitive. Fresh fruit generates traces of ethylene gas, which can accelerate the wilting process of cut flowers.
- Make sure the water is at the proper temperature. Most flowers do best in room-temperature water. Bulb blossoms endure the longest in cool or even cold water. Fill your vase to three-quarters full and keep topping it off as the flowers absorb more liquid, whether you’re using cold or lukewarm water.
- Use only warm or hot water. In order to thrive, flowers need a temperature range of 80° to 110° Fahrenheit. The water in the vase does not need to be maintained at that temperature, but always start cut flowers in warm, not cold, water. Cold water has a higher oxygen content, which can cause air bubbles to grow in the stems of your flowers, preventing their water uptake. Spring bulbs such as tulips and daffodils are the exception to this rule, as they prefer to be immersed in cold water.
- Make acidic water available.
- Cut flowers do best in slightly acidic water, particularly with a pH level between 3.5 and 5.0.
- Make your own flower food. If you don’t want to spend money on flower food, make your own at home. Traditionally, three parts water, one part Sprite (for sugar), and a few drops of bleach are combined to make the most popular vase-cleansing solution. Another traditional flower food recipe is to mix two teaspoons of apple cider vinegar, two tablespoons of sugar, and half a teaspoon of bleach into a quart of water.
- Feed the blossoms with a tablespoon of sugar. Some florists use a dash of bleach to limit bacterial development (about a quarter teaspoon per litre of water) (just a quarter teaspoon per litre of water). In both cases, the flower’s lifespan is extended.
- Nurture your flowers with a flower food package. Florists and supermarkets supply pre-packaged combinations of all the key preservatives that make cut flowers survive. A biocide is included in these flower food packets in order to kill unwanted germs as well as provide a balanced pH level for the water.
- Prune any leaves below the waterline. Any leaves immersed underwater might rot and create bacterial development, so it’s crucial to routinely check your flowers and remove any underwater leaves.
- Display the bouquet away from full light, heat, or hot and cold gusts. Place the vase far enough away from fruit bowls to avoid spills.
- Every day, make sure the vase is still there. Keep the healthy blooms free of bacteria by getting rid of any dead or fading blossoms.
- Change the water every few days, replenishing any flower food as well.
- Vodka helps to slow down the wilting process. Delaying the ageing of your cut flowers is possible by adding a little alcohol to the mix. The alcohol in vodka blocks flowers from generating ethylene gas, which is what makes flowers wither.
- Different harmful flowers into separate containers.
- Toxic compounds released by freshly cut hyacinths, iris, and daffodils can harm other aquatic plants. For a day, isolate these flowers from other kinds of flowers and place them in a separate container.
Which Flowers Are Best for Cutting?
- Most people have heard of cut Dianthus flowers, which include Carnations, Pinks, and Sweet Williams. 14 to 21 days is about right!
- Oriental Lilies, for example, are a long-lasting flower that can be displayed for up to ten days. When trimming lilies in the garden, leave a third of the lower stem. Daylilies (which are not genuine lilies) are not cut flowers; they don’t endure more than one day.
- Sunflowers and gladiolus both have a vase life of 7 to 10 days, and both make beautiful cut flowers.
- This flower’s life expectancy is around a week.
- Tulips may stay fresh in a vase for up to one week, and even beyond that time, they’ll continue to bloom. (The sap from some flowers, like daffodils, might diminish the vase life of other flowers. (Tulips don’t mix with daffodils.)
- Peonies last 5 to 7 days. In order to avoid damaging the young plants, only a few blooms from each peony plant should be harvested.)
- Sweet peas endure 3 to 7 days and give wonderful height to a flower arrangement. The more you trim your sweet peas in the garden, the more they will bloom!
Here are reader favourites from the flower cutting garden:
- Nerine, tulips, peonies, safflowers and salvia bloom from May through July.
- July to September: Sunflowers, Zinnia, Cosmos, Rudbeckia, Dahlias, Stock, Asters, Statice, Amaranthus
Is There a Shelf Life for Cut Flowers?
A variety of factors, including species and quality, influence how long cut flowers last after being removed from their stems. Fresh cut flowers from your garden can go immediately into a vase, preserving optimum freshness. Cut flowers from the grocery store or a flower delivery service may be fresh, or they may have languished in a warehouse for days.
Consider chrysanthemums, carnations, alstroemeria, lis, hydrangeas, and clematis if you want long-lasting flowers. This bouquet should last for at least ten days when placed in fresh water. Chrysanthemums have been known to endure upwards of four weeks, which causes some florists to consider them the greatest flower for indoor vases. Other flower species like lilacs, daisies, and peonies survive a substantially shorter time—usually three to seven days, depending on the type.
Plucking Flowers Is Better Than Cutting Them Is it?
The vase life of your fresh garden flowers can be extended by cutting them instead of plucking them when you bring them inside. When you cut a flower at a 45-degree angle using clean garden shears, you offer a vast surface area for the stem to absorb water in a vase. The flower’s surface area is reduced when it is picked.
Cut flowers in the morning or evening when the blossom holds optimum moisture. If you cut your flowers at noon, they will have a shorter vase life because the air is drier. Then immediately put your fresh flowers from the garden in warm water until you’re ready to place them in a floral arrangement.
The longer you keep your cut flower arrangements, the more enjoyment you’ll have from them. What advice do you have to offer? Share it with us in the space provided!
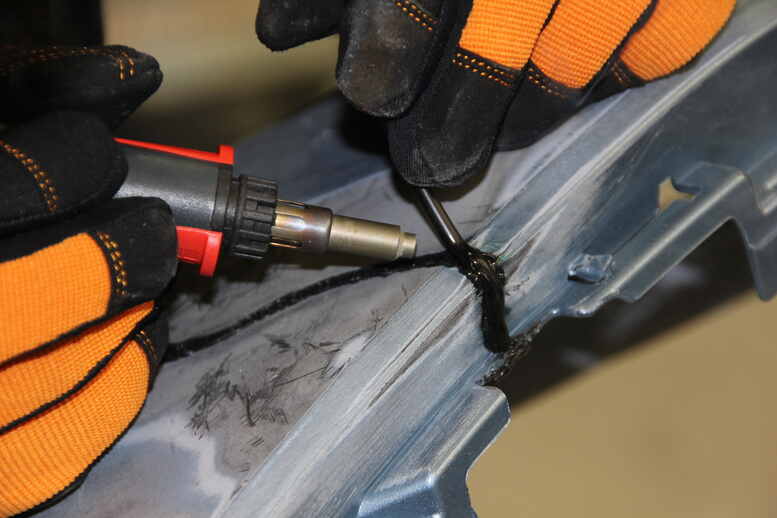
Plastic welding kits are a must-have for plastic fabrication, repair, and modification. Whether you work in the plastic industry or you’re a lover of DIY projects, with a plastic welding kit, you can get more done without the need for a professional. So, in essence, you’re saving time, money, and energy! There are many applications, but the question remains: when exactly does it come in handy?
Why Replace It When You Can Repair It?
People quickly throw out broken plastic materials because the thought of repairing them is tiring. But, if you work in the plastic industry or you’re a DIY enthusiast, then you would know that no plastic is beyond repair unless it’s shattered to powder.
Rather than replace your favorite plastic materials, you can grab a kit and fix it. From plastic furniture to automotive parts and garden tools, a plastic repair kit has what it takes to restore your household plastic items.
Long Lasting Repairs
If you want industry-grade repairs without the need for a plastic welder, what you need is a solid plastic kit. There are different types of kits, all curated specifically for different grades of repairs. But for household projects, a basic plastic repair kit will do. A typical plastic welding kit contains welding tips, a welding rod, alloy steel staples, a metal brush, and a hot air gun.
The kits always come with a guide. The level of expertise you have doesn’t really matter; as long as you can handle medium-level tools, you should be able to use one.
The Versatility
We’ve said it before, and we’ll say it again: regardless of your industry, niche, or level of expertise, you’ll find use for a plastic welding kit. It can be used;
- Sealing pipe leaks in the plumbing industry
- Fixing bumper cracks and dents in the automotive industry
- To weld plastic sheets in the construction industry
- To repair household plastic materials and take your DIY project to the next level
When used correctly, a plastic welding kit can transform your projects, reduce work time, guarantee seamless repairs, and extend the lifespan of your plastic materials. If you need to learn about plastic welding, check out the latest news in our blog section and stay updated on the latest in the industry.
Read More: Bryan Chatfield Sanders

Planning a wedding comes with countless details, one of which is managing transportation for guests. Many couples want to make sure their guests feel cared for and have a memorable experience from start to finish. Using a shuttle service for wedding guests can solve numerous logistical challenges while adding a touch of elegance to the day. Here’s why a shuttle service is an ideal choice for transporting wedding guests and how they can enhance the experience.
- Enhanced Guest Convenience
One of the primary reasons couples choose shuttle services for weddings is the convenience it offers guests. Weddings often take place at venues with limited parking or remote locations, which can make transportation challenging. A shuttle service eliminates the need for guests to navigate unfamiliar areas or worry about parking. By providing a reliable shuttle, couples can ensure that all guests arrive safely and on time, without the added stress of finding the venue or dealing with traffic. Plus, shuttles can pick guests up from designated hotels or central meeting points, making it easier for everyone.
- Improved Safety and Enjoyment
A shuttle service enhances safety, especially for weddings where guests may be celebrating with a few drinks. By arranging a shuttle, couples allow guests to enjoy the festivities without the worry of driving back late at night or needing a designated driver. Additionally, shuttles provide a space for guests to relax, socialize, and extend the celebration while traveling to and from the venue. For weddings held in secluded locations, shuttle services can help ensure that guests aren’t stranded or dealing with hazardous late-night driving.
- Efficient Time Management
Shuttles can streamline the schedule and help weddings stay on time. With a designated transportation plan, couples can set clear departure and arrival times to keep the day on track. Shuttle services allow couples to manage the flow of guests, ensuring everyone arrives promptly for the ceremony and that the celebration begins as planned. Shuttle drivers are experienced in working with event timelines, which helps avoid delays and ensures a smooth, enjoyable experience for all.
- Cost-Effective Solution for Group Travel
For couples hosting a larger wedding, providing transportation might seem costly initially, but it can be surprisingly affordable, especially when compared to individual travel arrangements for numerous guests. Shuttle services often offer packages for weddings, and the cost of renting a shuttle is typically lower than arranging multiple taxis or rideshare vehicles. Additionally, guests won’t have to worry about the cost of parking or arranging separate transport options, which can be particularly valuable for out-of-town attendees.
- A Cohesive Experience and Added Luxury
Shuttle services can add an element of luxury and thoughtfulness that many guests appreciate. Offering a shuttle creates a seamless, coordinated experience that reflects the couple’s attention to detail and care for their guests’ well-being. Some couples even decorate the shuttles to match their wedding theme or provide music and refreshments, turning the shuttle ride into an extension of the celebration. These personal touches can make the experience more memorable and enjoyable.
- An Eco-Friendly Transportation Choice
For environmentally conscious couples, shuttle services offer a more eco-friendly transportation option. By consolidating transportation into one or a few vehicles rather than multiple individual cars, shuttle services help reduce the wedding’s overall carbon footprint. This is especially beneficial if the venue is in a remote location, as it minimizes emissions from guest vehicles. Some shuttle companies even offer eco-friendly fleet options, making it a sustainable choice for group travel.
- Accommodates Guests with Special Needs
Shuttle services can be especially helpful for guests who may need extra assistance, such as elderly relatives or those with mobility issues. Many shuttle companies offer ADA-compliant vehicles equipped with wheelchair ramps or other features to ensure comfort for all guests. This added convenience can be invaluable for guests who might otherwise have difficulty with standard transportation options.
- Planning Tips for a Smooth Shuttle Experience
To ensure a seamless shuttle service experience, there are a few planning tips couples should keep in mind:
- Book Early:Shuttle services are popular for weddings, especially during peak wedding season. Booking early ensures availability and allows time to coordinate pickup and drop-off points.
- Communicate with Guests:Let guests know about the shuttle schedule and pickup locations in advance, either in the invitation or through a wedding website. Providing this information helps everyone plan accordingly and reduces last-minute confusion.
- Consider Multiple Trips:If your guest list is large, consider arranging for multiple trips to accommodate everyone. This way, guests can choose from different pickup times that work best for them.
- Coordinate with the Venue:Work with your venue to establish clear pickup and drop-off areas. Some venues have specific spots for shuttles, and this helps make the process more organized.
Conclusion
Offering a shuttle service for wedding guests is a thoughtful gesture that provides convenience, safety, and an added touch of luxury to your special day. From cost savings to an improved guest experience, a shuttle helps ensure that everyone arrives at the wedding relaxed, on time, and ready to celebrate. For couples looking to simplify logistics and create a memorable day for their loved ones, shuttle services are a practical, elegant solution that truly enhances the wedding experience.

Having your building properly insulated is of utmost importance in this day and age of rising energy costs and increasing environmental concerns. Among the many insulation options available, spray foam stands out, known for its remarkable efficiency and unique properties.
But when diving into the world of polyurethane foam, you are immediately met with a choice: open cell or closed cell? Each comes with its own set of benefits and considerations. Let’s take a closer look.
Spray Foam Insulation: The Basics
Derived from a synthetic polymer blend, spray foam insulation plays a pivotal role in enhancing energy efficiency. It’s widely used to insulate walls, roofs, and other sections of buildings, cutting down those hefty heating and cooling bills. Beyond residential structures, you’ll find it guarding pipes, tanks, and machinery in industrial settings.
So, what makes it so versatile? The answer lies in its creation. By mixing multiple liquid components, including those with heat-insulating agents, this foam offers unparalleled insulation advantages. But not all foams are created equal.
Open Cell Insulation
1. What’s it like?
Open cell foam is softer and more flexible, expanding significantly upon application – up to a whopping 100 times its initial size!
2. Air’s Arch-nemesis:
Boasting a density of 0.4 – 0.6 lbs/cubic foot, it’s a champion in reducing air leaks, which can have a direct impact on indoor air quality.
3. Silence, Please:
If you’re looking to mute those external noises, open cell is your ally. It’s exceptional at dampening sounds and vibrations.
4. Adaptable and Tenacious:
As buildings shift over time, open cell foam remains resilient, enduring seasonal changes without cracking.
5. Easy on the Wallet:
Budget-conscious homeowners rejoice! Open cell insulation is generally more affordable due to its lower installation resource needs.
6. A Few Shortcomings:
It does have a lower R-value (3.5 – 3.9 per inch), so its thermal resistance isn’t as high. Additionally, it doesn’t act as a moisture barrier, which could invite mold or structural damage. And, to safeguard against fire, UV rays, or pests, you’ll need to add extra protective layers.
Closed Cell Insulation
1. What’s it like?
Unlike its open-cell counterpart, closed cell foam is dense and rigid, expanding to depths of about 30-50mm.
2. The Impenetrable Fortress:
With a density of 1.5 – 2 lbs/cubic foot, closed cell acts as both an air and moisture barrier, championing superior thermal resistance.
3. Sturdy and Strong:
One of its crowning glories is the ability to enhance a building’s strength, adhering firmly to the structure.
4. The Price Tag:
Its benefits come at a cost – literally. Closed cell insulation tends to be pricier due to the increased material and labor needs.
5. Impressive Thermal Capacity:
If retaining heat is your primary concern, this foam, with its R-value of 6 – 7 per inch, has got you covered.
6. Barrier Benefits:
Not only does it keep the cold air out, but it’s also a barrier against water, minimizing condensation issues.
7. Built to Last:
Come rain or shine, or the threat of pests, closed cell foam stands firm. However, its rigidity can be both a blessing and a curse. Over time, temperature changes might cause it to shrink and crack.
Final Thoughts
Insulation using polyurethane foam has undeniably revolutionized the world of building insulation. Companies like Isothane are at the forefront, ensuring the quality and efficiency of this material.
When deciding between open and closed cell, consider the specific needs of your project, budget, and long-term goals. Both have their merits, and understanding them can help you make an informed decision, ensuring that your space is comfortable, efficient, and protected for years to come.
For mor information visit https://isothane.com/spray-foam-insulation/


Wardrobe Hangover: Why You Keep Buying Clothes You Don’t Wear
The Quiet Shame Hanging in Your Closet Open your wardrobe right now. Look at it honestly. How many pieces in...


The Outfit That Speaks for Itself: Zach Bryan Merch, Parke, and Rolex Replica Every Day
Getting Dressed Should Feel Like a Decision, Not a Default Every morning, you choose what to wear, even when it...


Men’s Streetwear Denim Guide 2026: How Amiri and Mixedemotions Get Premium Jeans Right
Why Denim Became the Most Debated Purchase in Men’s Streetwear Denim sits at a strange intersection in men’s fashion. It’s...


Why Some Online Casino Games Feel Easier to Return To
Online casino lobbies are full of games trying to look different. One has a huge bonus feature. Another has a...


When Access Becomes Instant Patience Becomes Optional: Z library
The Speed of Modern Reading Long waits once shaped the reading world. A trip to the library meant fixed hours...


Assessing the Chances of South Africa at the World Cup
Football followers across the globe are counting down the days until the World Cup with fans in South Africa eagerly...


Designs that Support Longevity in Online Gambling Platforms
Online gambling platforms, including mobile apps like betway, are at their most popular today and that is not by luck...


Custom Tent Buying Guide: Key Features to Look for in a Durable Branded Display
A tent is much more than a practical shelter in the competitive nature of the events held at the trade...


Why Stability Matters: Navigating the Choice to Move Fostering Agencies
The decision to become a foster carer is often driven by a profound desire to provide a stable, loving environment...


Understanding Stairlifts in the Home
Stairlifts are a practical adaptation designed to support people who experience difficulty using stairs within their own homes. They are...


The Power of Digital Marketing for Business: A Guide to Maximizing Your Reach

Car Hire vs Public Transport: Which Is Best for Touring Switzerland?

Building trust in a rapidly evolving payments ecosystem

Can Your Business Survive Without a Charlotte SEO Agency in 2025?

Choosing the Right Will and Trusts Attorney for Your Estate Planning Needs

Remaining Healthy While Engaging in Online Casino Games
-
 Biography7 years ago
Jacqulyn Elizabeth Hanley is the Mother of Liza Soberano?
-
Biography7 years ago
Amanda Levy Mckeehan Biography, Family, Net Worth, Age, Affairs, Facts
-
Home6 years ago
Epson L3110 Driver Free Download Latest Updated Version
-
Games5 years ago
Best Free To Play MMORPG To Try This 2021
-
Biography7 years ago
Who is Rose Dorothy Dauriac? Scarlett Johansson Daughter?
-
Home7 years ago
Liza Soberano Biography, Age, Family and Boyfriends
-
Biography7 years ago
Jessica Ditzel Secret Information that Nobody Knows | Joe Rogan’s Wife
-
Biography7 years ago
What is the relation of Nathaniel Larry Osorno with Liza Soberano?